The life changing act of cooking without a recipe

Make pesto without a recipe as a form of self-care

I crave pesto in the summer when basil begins to show up at the market, and I can smell the tomatoes before I taste them.

I crave pesto in the winter when skies are dark and the air is crisp, and I need something to remind me that winter will not stay forever.

Pesto is hands down my favorite food, and I’ve never made it with a recipe. It’s a cathartic process, it brings up memories, it slows me down, it makes me feel, smell and taste. It does more than nourish my body, it nourishes my body mind and soul.

First, you need to understand that you don’t need a recipe for everything. You can throw things together and make up food as you go. You can create new flavors that wow you or leave you wondering what you did wrong. It is important to experiment and be confident. Give yourself the freedom to color out of the lines and go off script. We live in a world that is highly controlled. Bites are documented before we taste. Ingredients and recipes are overthought before we cook. Cooking without a recipe is self-care. It is freeing and creative and we need more of this.

Ditch the recipe and let your tastebuds guide you

Gather your ingredients. You need soft fresh herbs. Basil is traditional and the base of all my pesto. You can also consider spinach, parsley, cilantro, mint, tarragon or any other soft herb. Get creative and combine the herbs. I know this can be scary for some people, but seriously, you are making a sauce, what do you have to lose?

You will also need garlic, your choice of oil, nuts or seeds, salt, lemon or whatever citrus you like and cheese unless you want to make vegan pesto, then just omit the cheese.

I use my Cuisinart to make pesto, first I pulse my garlic and nuts/seeds until chunky. I have made pesto with macadamia, walnuts, pecans, pistachios, cashews, pumpkin seeds, sunflower seeds, peanuts, and filberts. No matter what nut or seed I use, it always turns out AWESOME! So, how much should you use? However much you like. I typically throw a couple of handfuls of nuts/seeds in and use anywhere from 3 -9 cloves of garlic. The point here is choose your own adventure.

Next, I add the basil and other herbs and cheese. For my cashew pesto batch I used spinach and basil combined. Just fill the food processor bowl up to the top and pulse a few times until it looks like this.

pesto in process
pesto in process

This is a good time to take your first taste and see if you have enough garlic, nuts, cheese. Adjust as needed.

Then I run the food processor and pour in oil until it starts to get loose. It will change from a solid to a liquid and that’s when I stop pouring in oil. Open the top and squeeze some citrus in. You can use lemons, limes, yuzu, grapefruit, anything tart will work. Tasting as you go will help you to determine what you like. I usually squeeze half a lemon in and then add good amount of salt. Pulse a couple of times.

At this stage I am tasting after every addition, so basically I am just eating pesto straight out of the bowl. I find that there is a magic point when you’ve added just the right amount of salt and all of the flavors merge and explode and at that point you stop and taste it one more time and find perfection.

Viola! You’re done! Now divide it all into freezer safe containers, top it off with a little more oil, date and label and put into your freezer. Remember to leave one in your refrigerator for dinner tonight, because…pesto is great for dinner!

pesto made without a recipe

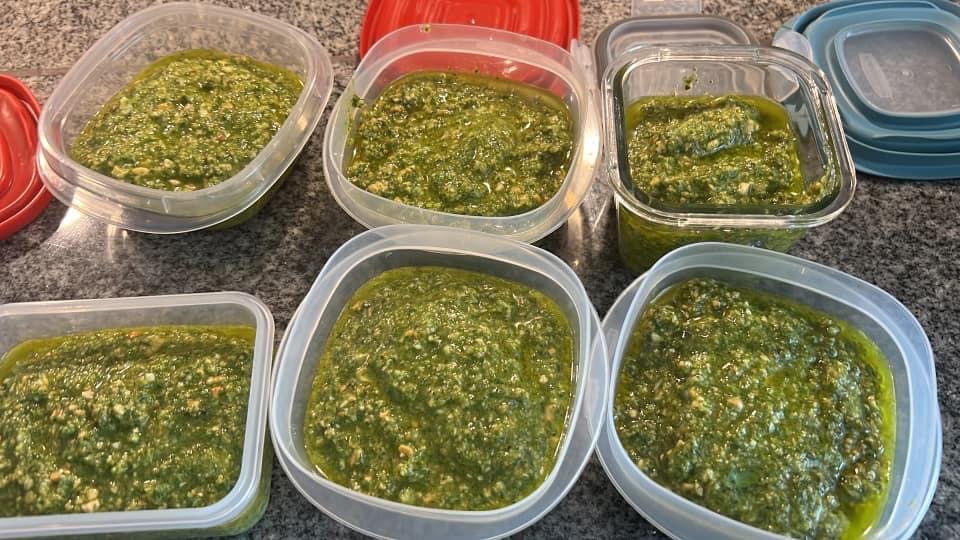
Batch one, cashew pesto

Deli Ops 101 – recipe costing and more

Recipe costing with a view! We are hosting a diverse group from all over the country as we return to in person gatherings. I am delighted to meet these smart and creative people that have put aside their busy jobs to spend the week with us.

Acqua Hotel, Mill Valley is the most ideal spot to host Deli Ops 101. After 2 of the most challenging years in the food service industry, folks have traveled from all over the country to sit with this view and learn new skills to help them take their food service departments to the next level.

We are spending today learning about production planning and how to wisely analyze movement reports. Next up, the importance of recipe costing and setting the right retail price to achieve a healthy margin. With cost of goods continuing to rise, I recommend starting your pricing at 75% margin. You will need to adjust each product as you aim to achieve a 67% overall margin. I am teaching variable margin strategy a topic I am extremely passionate about. I am excited to work with new clients on inventory management and recipe costing. Please contact me to discover how I can help your business battle rising costs. http://moxie.consulting. I specialize in inventory management, recipe costing and margin/ food cost analysis for restaurants and retail businesses.

Due to the success of this event, we are planning our next installation of Deli Ops 101 for spring 2023. Stay tuned for our event announcement and see how our team can support your operation at https://www.deliops101.com

Acqua Hotel Mill Valley

Do try this at home!

About once a year I embark on a paleo driven elimination program called the Whole30. The premise is that for 30 days you eliminate all hormone and gut disrupting, inflammation causing foods including: dairy, legumes, alcohol, grains, sugar and all prepared foods containing any of these ingredients or other unhealthy additives. Basically, you eat real food three times a day, no snacking, no cheating. My meals are typically a piece of meat, a lot of veggies and a healthy fat like avocado or nuts or olive oil. You are allotted one cup of coffee a day, and I like mine with the thick creamy top of the coconut milk mixed in. The rest of the day I’m drinking a lot of water, sparkling water (LaCroix is my favorite) and herbal teas. Clearly, timing is crucial when planning a Whole 30. I tend to avoid attempting the program anywhere around my birthday, the holidays, vacation or the Provender Conference.

After 30 days, you slowing reintroduce something from each food group and take notice of how your body reacts. At the end, you have an individualized “diet” that is perfect for just you. I think 30 days is a small price to pay for such a gift.


The things I’ve learned in my Whole30 experiences are really interesting, and I learn something new each time I complete a Whole30. Recently, it became abundantly clear that when I get stressed my body craves sugar. I already knew everything has sugar in it or some sweetener, but when you are getting REAL about eliminating this ingredient you really realize how EVERYTHING has sugar in it. It’s crazy! Like mayo, sriracha and almond milk just to name a few.


So, I decided to make my own, and I cannot believe how easy it is and how much better these home made products taste. In our world we hear the phrase “Don’t Try This at Home” far too often, it is my intention to turn the table and challenge you to Try This at Home. Whether it is taking on the Whole30 program, or simply making your own mayo. What have you got to lose? Either way, as always, Enjoy!

Homemade Mayo
Yields 1
You will wonder why you ever chose store bought mayo after trying this!
Write a review
Print
Prep Time
2 min
Total Time
5 min
Prep Time
2 min
Total Time
5 min
Ingredients
  1. 1 egg, room temperature
  2. 1 cup avocado oil
  3. 1/2 tsp mustard powder
  4. 1/2 tsp salt
  5. juice of 1/2 - 1 lemon or lime
Instructions
  1. Put all ingredients into a 16 ounce wide mouthed mason jar
  2. Using an immersion blender, blend for about 20 seconds, moving the wand up and down
  3. Taste and adjust seasonings
  4. Screw on the lid, and store in the fridge.
Kitchen Thyme https://kitchenthyme.moxie.consulting/

Hands On Sauerkraut Class

In preparation for my upcoming Hands On Sauerkraut class at this years Provender Conference, I am gathering information from some of my favorite sources, mixing it in with my own experiences and setting it aside for 3-5 days to let the bacteria flourish!

The coolest thing that i learned today in my research is the benign lactic acid bacteria that make sauerkraut what it is,  were born and evolved eons ago in some rotting veggie pile.  I love the idea of something literally being born in a heap of compost that changes the way that humans eat forevermore.  Or not.  As  humans shy and yield away from eating fermented foods there has certainly been a boom of, up til now unknown, gut issues, auto immune diseases and the like.  I think that those bacteria born all those eons ago and living in our bodies are our best friends and even though we can’t talk to them, we do get to enjoy hanging out together all the time, occasionally sharing a beer and well, pretty much all of our meals are enjoyed together.  What i am trying to say is that these bacteria are, in my opinion, the key to our health and well being and without them all sorts of diseases and disorders are born in their absence.  

And fermented foods are DELICIOUS!

I think somewhere along the line once sauerkraut started being canned and pasteurized for mass production we all got a bad taste in our mouths, and for most of us that was the only taste of sauerkraut that we’ve ever had, and it wasn’t that great.

But homemade sauerkraut is fast and easy and delicious and if you’ve never tried making it or eating it, please, let me introduce you to your little friends!

The basic ratio for making sauerkraut is 5 lbs of finely shredded cabbage (about the thickness of a dime) to 3 T sea salt or some other high quality salt.  Thats all you need!  Massage the salt into the cabbage, put the cabbage in a jar and let it sit for about a half an hour.  Then, using some sort of tool mash it up to release the water from the cabbage and create a brine.  The cabbage needs to be at least an inch below the brine and it needs to stay there.  So, cover the kraut with cheesecloth and weigh it down with boiled rocks, or a smaller jar full of water, or anything you have around the house, just make sure to sterilize it first.  The let it sit in room temperature (the cooler the better) for 3-5 days until the bacteria are born.  After that put it in the pantry or the fridge, somewhere nice and cool and let it sit as long as you want to.  Check it every couple of days and if there is scum forming, then scrape it off.  Also, taste it every few days so that you know when it is perfect for you.

Easy Peasy!

At the class i am also going to have available: beets, turmeric, ginger, juniper berries, caraway seeds and most likely some other random spices so that participants can mix and match and play and create their very own batch of sauerkraut to take home to remember the fun they had at Provender 2015!

Labels would be so cute for the jars…with Moxie Consulting on them…sigh..so little time so much to do!

Now get out there and grow some bacteria and Be Well!

xoxo

-m


Summer in a Jar

When I go to see my grandma I gain a lot of weight

With her dear hands she gives me plate after plate.

She cans the pickles, sweet & dill

She cans the songs of the whippoorwill

And the morning dew and the evening moon

‘N’ I really got to go see her pretty soon

‘Cause these canned goods I buy at the store

Ain’t got the summer in them anymore.

                                              Canned Goods, Greg Brown


I have been listening to this song a lot lately, well actually, I have been listening to a lot of music lately as I stand in the kitchen, sweat beading on my forehead and attempt to preserve the abundance of the gardens this year while at the same time passing on a family heirloom that is as cherished as the Cherokee Black tomatoes I grew in the garden. This heirloom that is as much a part of me as my father’s nose and my mother’s eyes is one of the true gifts that I will pass onto my daughter. It is so crucially important that I pass on this gift to her that I sometimes question if the pressing urgency to share the knowledge of preserving food with the next generation actually is coming from me, or from my ancestors long passed working their magic through me.


In the heat of late summer the stove is the last place I want to be, yet here I stand for hours and hours wondering why I am so possessed to do this, wondering if all of this work even saves me any money. I can go to my local co-op and buy a jar of strawberry jam for a couple of bucks and we have a local producer that makes great dilly beans. Tomato sauce? It’s on sale all the time; I can buy it by the case and get a discount. Then, floating on the steam collecting above my head I hear Greg Brown singing “Cause these canned goods I buy at the store Ain’t got the summer in them anymore,” and the essence of what I am doing comes to light. I am putting the seasons in a jar. All of the winter nights pouring over seed catalogues dreaming of the sun, the rainy spring that nourished the seeds and threatened to flood the land, the hot dry summer that made it almost impossible to keep everything watered, harvesting everything under the blazing sun, or sometimes in the middle of the night just to beat the heat, our daughter laughing and crying, stepping on baby plants and kissing them better, harvesting onions and sometimes just wanting it all to stop. All of that goes into the jar, a year of our family, our love, our struggles, our successes, our life, our food.


As I write this the strawberries have been preserved, the beans and the okra have been pickled, and the plums have been brandied and jellied and jammed. The tomatoes have almost taken me down with enchilada sauce and salsa and marinara and just whole canned tomatoes with herbs thrown in. The peaches are nestled in their sweet bath and I am ready to be done, but I look out the window and I see an acre of pumpkins and winter squash and I start to get that feeling again, one of delight and dread. What will I do with it all?


I did some research and found out that pumpkin and winter squash due to their low acidity cannot be canned using the water bath technique and since I do not have a pressure cooker, I will have to rely on my Excalibur dehydrator and my freezer to get me through. I plan to cube and steam the pumpkins and winter squash and then freeze them for curries and soups and warm thick winter dinners that will coat our insides with summer and keep us cozy. I will steam and puree both winter squash and pumpkin and put them into freezer for breads and pies and treats to bring sunshine into the dark. Last but not least I will dehydrate it to make pumpkin leather with some honey and spices for my daughter Stella, the now holder of the family heirloom, so that one of her favorite treats will always remind her of this gift that she holds and of her responsibility to make sure that her children know how to put the seasons in a jar.


Pumpkin Pie Fruit Leather
an easy way to utilize a bumper crop of winter squash or pumpkin and make a delicious treat for your kid's lunchbox
Write a review
Print
Ingredients
  1. 2 cups steamed pumpkin or winter squash puree
  2. 1/4 cup local honey
  3. 1/2 tsp cinnamon
  4. 1/4 – 1/2 tsp ginger powder
  5. 1/4 tsp powdered cloves
  6. 1/8 tsp nutmeg
Instructions
  1. Mix all ingredients well.
  2. Using the solid sheets that come with your dehydrator, or parchment paper, generously spread the pumpkin mixture, taking the time to spread as thinly and evenly as possible.
  3. Dehydrate at 140 degrees until dry but still pliable.
  4. Peel it off the sheets with a flexible metal spatula, if it is over done it will be brittle, but still delicious. If it is under done it will be too wet to peel off, so just put it back in the dehydrator.
  5. Store in a glass jar sealed tightly in the pantry.
Kitchen Thyme https://kitchenthyme.moxie.consulting/
 

Pickling a Brisket

With St. Patty’s Day fast approaching, corned beef has started to make its appearance in the grocery store.  It’s an interesting piece of meat, that a lot of people love to eat but many have no idea of really what it is, or how to make it themselves.

Corned beef is pickled brisket and it harkens back to the days before refrigeration where a popular way of preserving meat was to pack it in salt or pickle it. At one time, corn referred to the number of kernels or seeds including the coarse salt granules packed around the brisket. So, the meat was called corned beef in reference to the corns of salt.   If you can brine a turkey for Thanksgiving then you most certainly can pickle a brisket for St. Patricks Day.

Most recipes call for pink salt which is a salt and sodium nitrate mixture.  This preserves the pink color of the meat.  I personally do not eat food with added nitrates or nitrites, so substituting some celery juice which has naturally occurring nitrates in it, is my choice.

The following recipe is very vague on purpose.  If you are going to make your owned corned beef then you should also make your own pickling spice, so while i will provide suggestions on which spices to use, i will let you decide the amounts so that you can really own this corned beef!  Don’t stress about this step, whatever spices and in whatever amounts you chose, will be fine.  Just have fun in the kitchen and enjoy the results.  You should start this in the next day or two if you want it to be ready for St. Patrick’s Day.  Let me know how it turns out.

Pickled Brisket (corned beef)
This is more of a template than an actual recipe because you create your pickling spice, start this recipe 6-8 days before you intend to serve it.
Write a review
Print
Ingredients
  1. 5 cups HOT filtered water
  2. 3 cups Guinness Beer or just add extra water if you want to omit the beer
  3. 2 cups juiced celery
  4. 1 3/4 cups kosher salt (chose the biggest and chunkiest salt you can find)
  5. 1 cup packed brown sugar
  6. 1/3 cup pickling spice ( see note below)
  7. 1 beef brisket, grass fed and about 6- 8 lbs
Instructions
  1. In a large, deep roasting pan, or a sterilized cooler if you don't have a roasting pan, pour water, beer, and celery juice.
  2. Mix in kosher salt and sugar until dissolved.
  3. Add pickling spice.
  4. Pierce the brisket all over with a sharp knife so it can soak up the brine.
  5. Add the brisket to the brine and place a heavy platter on top to weigh it down. Cover and refrigerate 3 days. Check at least once a day to make sure brisket is remaining submerged.
  6. Remove brisket from brine.
  7. Stir liquid to blend.
  8. Flip brisket and return to brine, weight with platter and cover. Refrigerate for an additional 3 days.
  9. After 6-8 days in the brine, remove the brisket and rinse with cold running water.
  10. Wrap with plastic, then foil and refrigerate. Can be removed from brine and stored for up to 2 days ahead.
Notes
  1. The basics for a pickling mix are: mustard seeds, whole allspice, whole coriander, whole cloves, bay leaves, red pepper flakes, dill seeds, juniper berries, fennel seeds, mace, black peppercorns and a couple of cinnamon sticks. Chose whatever combination of the above spices and mix them all together. Store in an airtight container for making pickles, or your next corned beef!
Kitchen Thyme https://kitchenthyme.moxie.consulting/

Spring is Coming!

If you haven’t already done so, it’s time to start thinking about a menu change for spring.  People lighten up their diets in the spring to slough off the heavy winter foods and prepare their bodies for the warmer and more active months.  So, get rid of that cottage pie and chicken pot pie until next Fall, and put a springtime focus in your menu.

Asparagus is a go to on the hot bar for spring.  Easy to prepare and popular with the community, it is truly the harbinger of spring.  If you have a local grower in your area, start a conversation with them about what they do with their “seconds”.  Many asparagus farmers have great quantities of asparagus that they cannot sell to top tier produce departments and thats where the deli can really come in and make a profit and help a local farmer.

These seconds are just fine for roasting whole for the hot bar, and if you get some that are too bloomed, then make a soup, or cut them up into a stir fry or fried rice.  

Here is great asparagus soup recipe.  Spring is comin’ Bring it on!

Cream of Asparagus Soup
A flavorful and easy soup, sure to delight! This recipe makes 22 Qts.
Write a review
Print
Prep Time
30 min
Cook Time
45 min
Prep Time
30 min
Cook Time
45 min
Ingredients
  1. 10 lbs organic asparagus
  2. 6 qts chicken stock
  3. 3/4 cup organic butter
  4. 3 cups finely diced organic onion
  5. 3 cups finely diced organic leeks (white parts only)
  6. 1/3 cup minced organic garlic
  7. 2 tsp salt
  8. 1 tsp organic black pepper
  9. 1/2 cup organic heavy cream
Instructions
  1. Cut the asparagus tips, about 1 to 1 1/2 inches in length, set aside.
  2. Cut or break off the woody ends from each spear and set aside.
  3. Cut the remaining tender stalks into 1/2-inch pieces, set aside.
  4. In a medium pot, bring the chicken stock to a boil. Add the tough woody stems, lower the heat and simmer to infuse with asparagus flavor, 20 to 30 minutes. Then, remove asparagus with a slotted spoon and discard, reserving the stock.
  5. Add the asparagus tips to the stock and blanch until tender, 1 to 1 1/2 minutes. Remove with a strainer and refresh in an ice water bath. Drain and put in a hotel pan, set aside.
  6. In another medium stockpot, melt the butter over medium-high heat. When foamy, add the onion and leeks and cook until tender, about 3 minutes.
  7. Add the garlic and cook until fragrant, about 1 minute.
  8. Add the chopped asparagus stalks, salt, and pepper, and cook, stirring, for 2 minutes.
  9. Add the reserved broth and simmer until the asparagus are very tender, 15 to 20 minutes. Remove from the heat.
  10. With a hand-immersion blender or in batches in a food processor, puree the soup until smooth. Taste and adjust the seasoning.
  11. Add cream and asparagus tips.
Notes
  1. When reheating this soup, be careful to keep the temperature low to avoid boiling. Boiling the soup upon reheat will cause it to separate.
Kitchen Thyme https://kitchenthyme.moxie.consulting/

It’s thyme for a tip…saving time with egg salad

fresh-eggs-kitchen-clock-p954-4809_zoomQuick tip of the day:

Making egg salad, and deviled eggs for that matter, can simultaneously make your customer base extremely happy and your staff extremely sad.  Anyone that has ever stood over 30 dozen  hard boiled eggs with the task of peeling them perfectly knows what i am talking about.  To save time and ensure a consistent product, many food service operations have moved into buying peeled hard boiled eggs.  There are some good quality options out there including organic and some companies are making them available in sizes that work for large commercial kitchens.  Talk to your distributors to see what you can find.

Once the eggs are all peeled, they still need to be cut into small pieces to make egg salad.  For moderate sized batches using a Vollrath Insta-Cut Dicer with a 1/2″ blade or larger will work quite nicely.  However, when making larger quantities of egg salad, toss all of your hardboiled eggs  into your Hobart mixer with the flat blade attachment.  Turn it on low and slow until eggs are broken into large chunks.  Then add the rest of your ingredients and mix until done.  This saves an unbelievable amount of time for those of you that have made your egg salad recipe somewhat of a staple in your community and have watched the batches grow to unbelievable yields.  

That’s all the thyme i have today for tips and tricks.  Check back again for more recipes, stories and other tidbits.

Until next time, enjoy your time in the kitchen…

Michelle

For the love of beets

IMG_3631.JPG
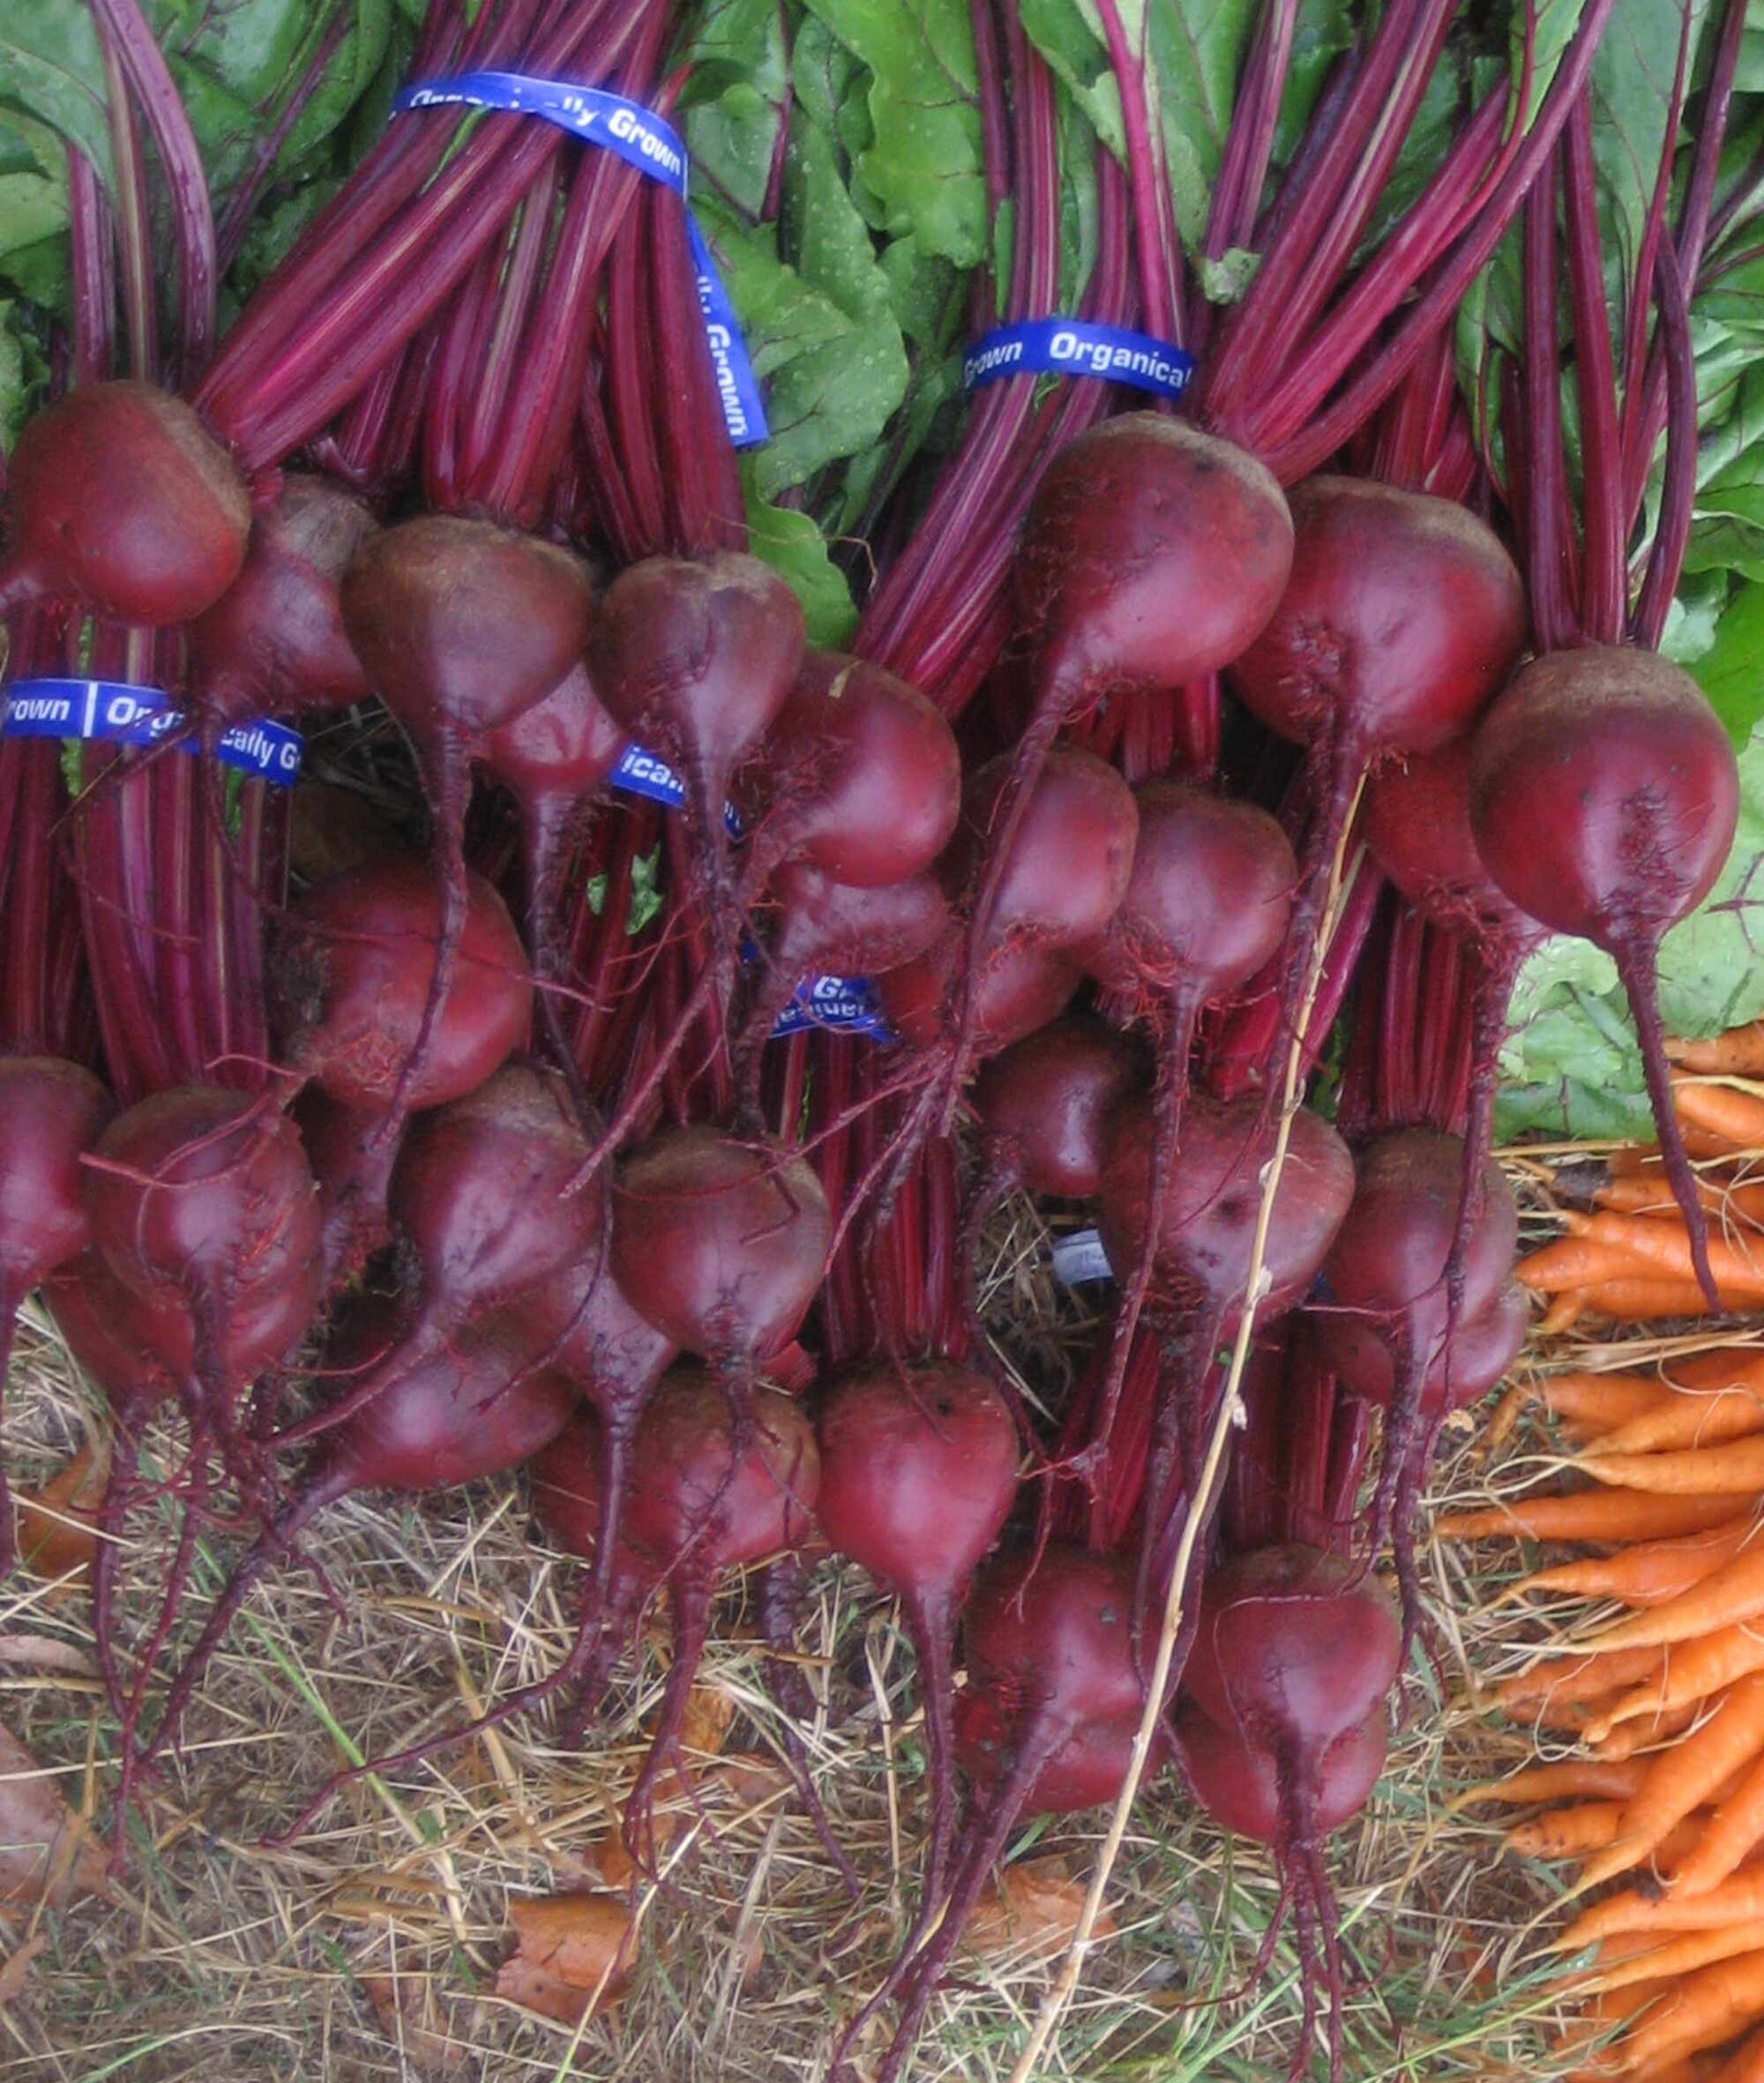
“The beet is the most intense of vegetables.  The radish, admittedly, is more feverish, but the fire of the radish is a cold fire, the fire of discontent not of passion. Tomatoes are lustyenough, yet there runs through tomatoes an undercurrent of frivolity. Beets are deadly serious.  Slavic peoples get their physical characteristics from potatoes, their smoldering inquietude from radishes, their seriousness from beets.  The beet is the melancholy vegetable, the one most willing to suffer. You can’t squeeze blood out of a turnip…”

Tom Robbins, Jitterbug Perfume

I have always loved beets. My parents grew them in our garden and I never thought it odd to love them as much as I did. I remember the first time I read Jitterbug Perfume, and I have read it many times, thinking that loving beets was something that made me part of some secret cool club, because in the pages of one of my favorite books the beet plays such a prominent role.

Beets can be sweet as sugar and sometimes dark and earthy, they vary as much in flavor as they do in appearance. The golden beets look amazing in a salad with chioggas. The red beets pair well with citrus and mint. I have come to find that many grown adults do not like, nor will even try beets. I find this astonishing as our culture eats more sugar than any other people in the world and sugar can be extracted from beets. I’d like to share the simplest of recipes that feature the serious yet delicious beet in hopes that by the end of February, you will associate this month with love and flowers and chocolates and BEETS.  As always, tune this recipe to your particular tastes and don’t be afraid to experiment, the beet is afraid of nothing! Continue reading “For the love of beets”

Why Moxie?

Welcome!  I am excited to be writing and hope that i can provide some tips and tricks of the trade, share some delicious recipes and a story or two along the way.

I want to briefly introduce myself and Moxie Consulting, so that you can understand why I am choosing to put myself out into the world in this way and what inspires me.  My name is Michelle O’Connor. I am a west coast girl and I have been surrounded by good, home grown, home made food my entire life.  When it came time to decide to do what i love, i found myself naturally drawn to the food service industry.  I chose jobs based on the values of the business, and i have been lucky to spend my entire career in kitchens surrounded by organic and locally grown ingredients.  Somewhere along the way, i had the courage to step away from the cutting board and try my hand at leading teams to be efficient and successful in the kitchen while still enjoying the camaraderie and fun that kitchen work has to offer, and i never looked back.

Moxie  by definition means pep, energy, courage and dedication. I chose this name for my consulting business because after years of hard work, i realize that Moxie truly embodies the energy that I bring to the table.  I am an energetic person that does not shy away from hard work and long hours.  I have the courage and dedication it takes to implement changes that will lead to success.  I love a good belly laugh and that is exactly what i did when Moxie was suggested as my business name.  It fits perfectly and i look forward to channeling my moxie to inspire and help others reach their highest potentials.

I welcome and encourage your feedback. If you have any questions, drop me an email at Michelle@moxie.consulting or visit my website at http://moxie.consulting

Be well, and until next time…Enjoy!